Single Sign-On with OpenID Connect
To help fit Prodigy into your existing organization, we’ve added support for Single Sign-On (SSO) following the OpenID Connect (OIDC) protocol. Prodigy will act as an OIDC Client that can connect to whichever OIDC Provider your organization uses (e.g. Auth0, Okta, Google, Microsoft Entra, etc.)
Installation
The Prodigy OIDC plugin is a feature only available with the Prodigy Company
License. If you have a Company License, ensure you have the company extra for
Prodigy installed:
python -m pip install
"prodigy[company]"
--extra-index-url https://
XXXX-XXXX-XXXX-XXXX
@download.prodi.gy
Alternatively, you can install the prodigy-company-plugins package explicitly.
This is equivalent to installing the [company] extra.
python -m pip install
"prodigy-company-plugins"
--extra-index-url https://
XXXX-XXXX-XXXX-XXXX
@download.prodi.gy
Using Auth0 as an OIDC Provider
In this guide we’ll focus on authenticating annotators to Prodigy with Auth0 but the same steps can be followed with any OIDC provider. This plugin has been tested with Auth0, Microsoft Entra, and Google Identity.
Create an Auth0 Application
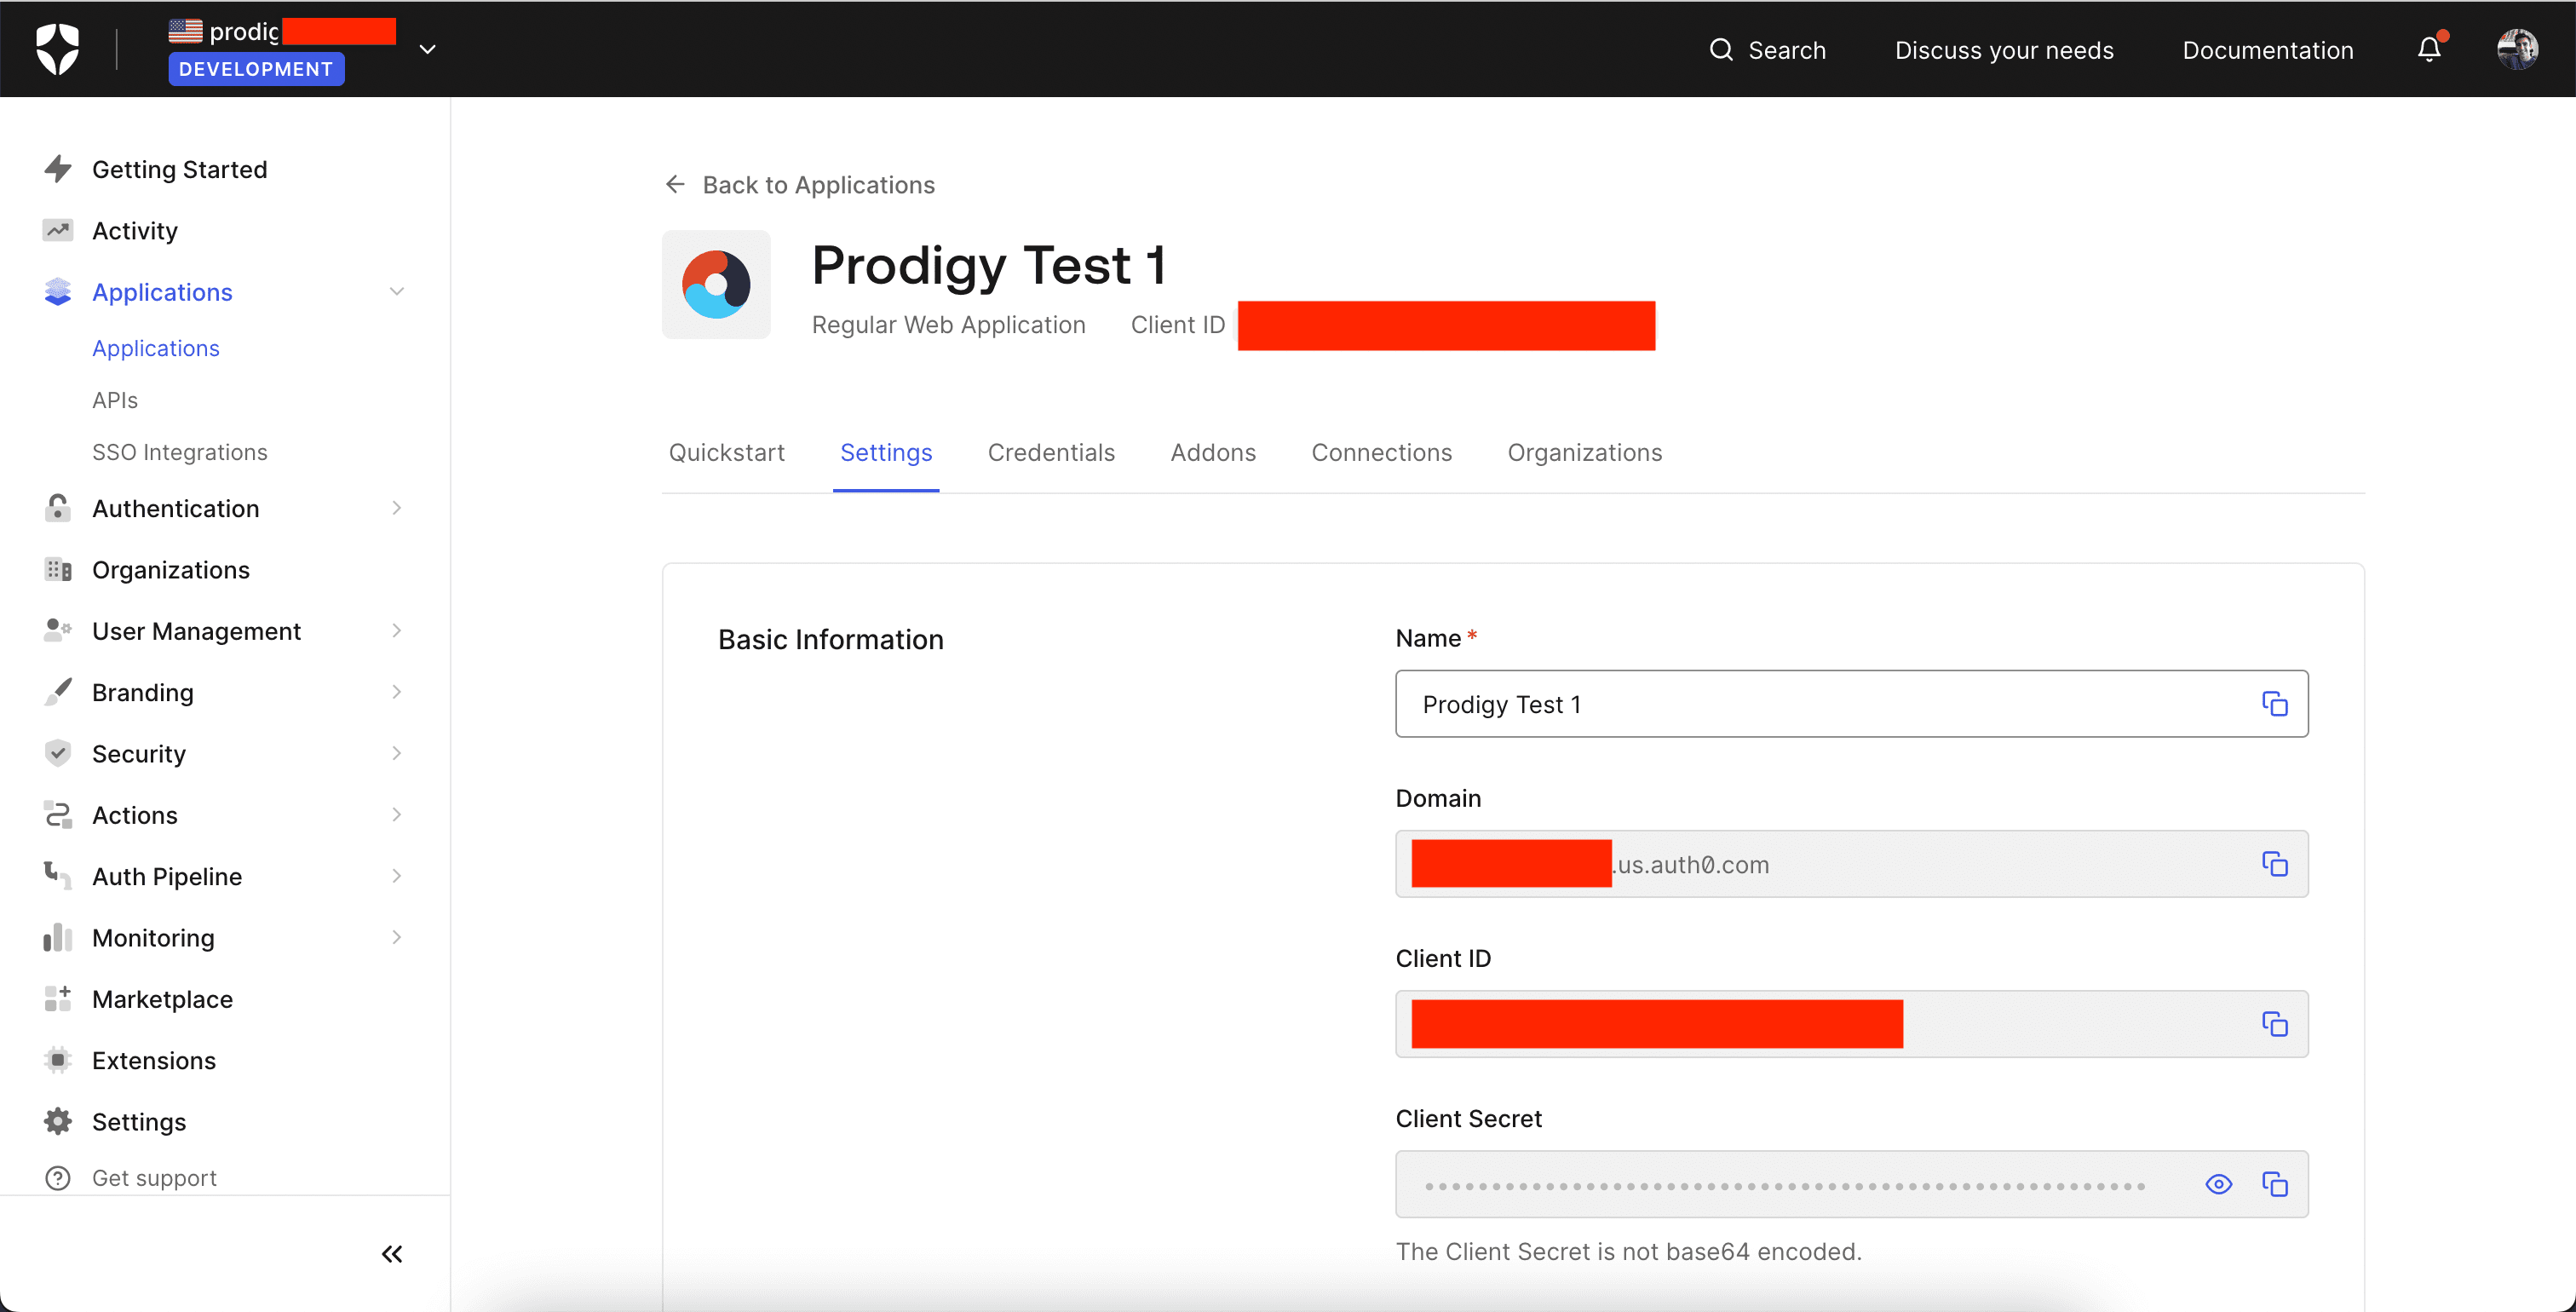
Once you’ve created your user account in Auth0, the first step is to create an application in Auth0 Dashboard. The application in Auth0 Dashboard is where you configure the authentication for the Prodigy web app. It shouldn’t take more than 10 minutes. You can find a step by step tutorial on how to create an application in Auth0 docs here.
At the end you should get a page like this with Config values you’ll use to setup Prodigy.
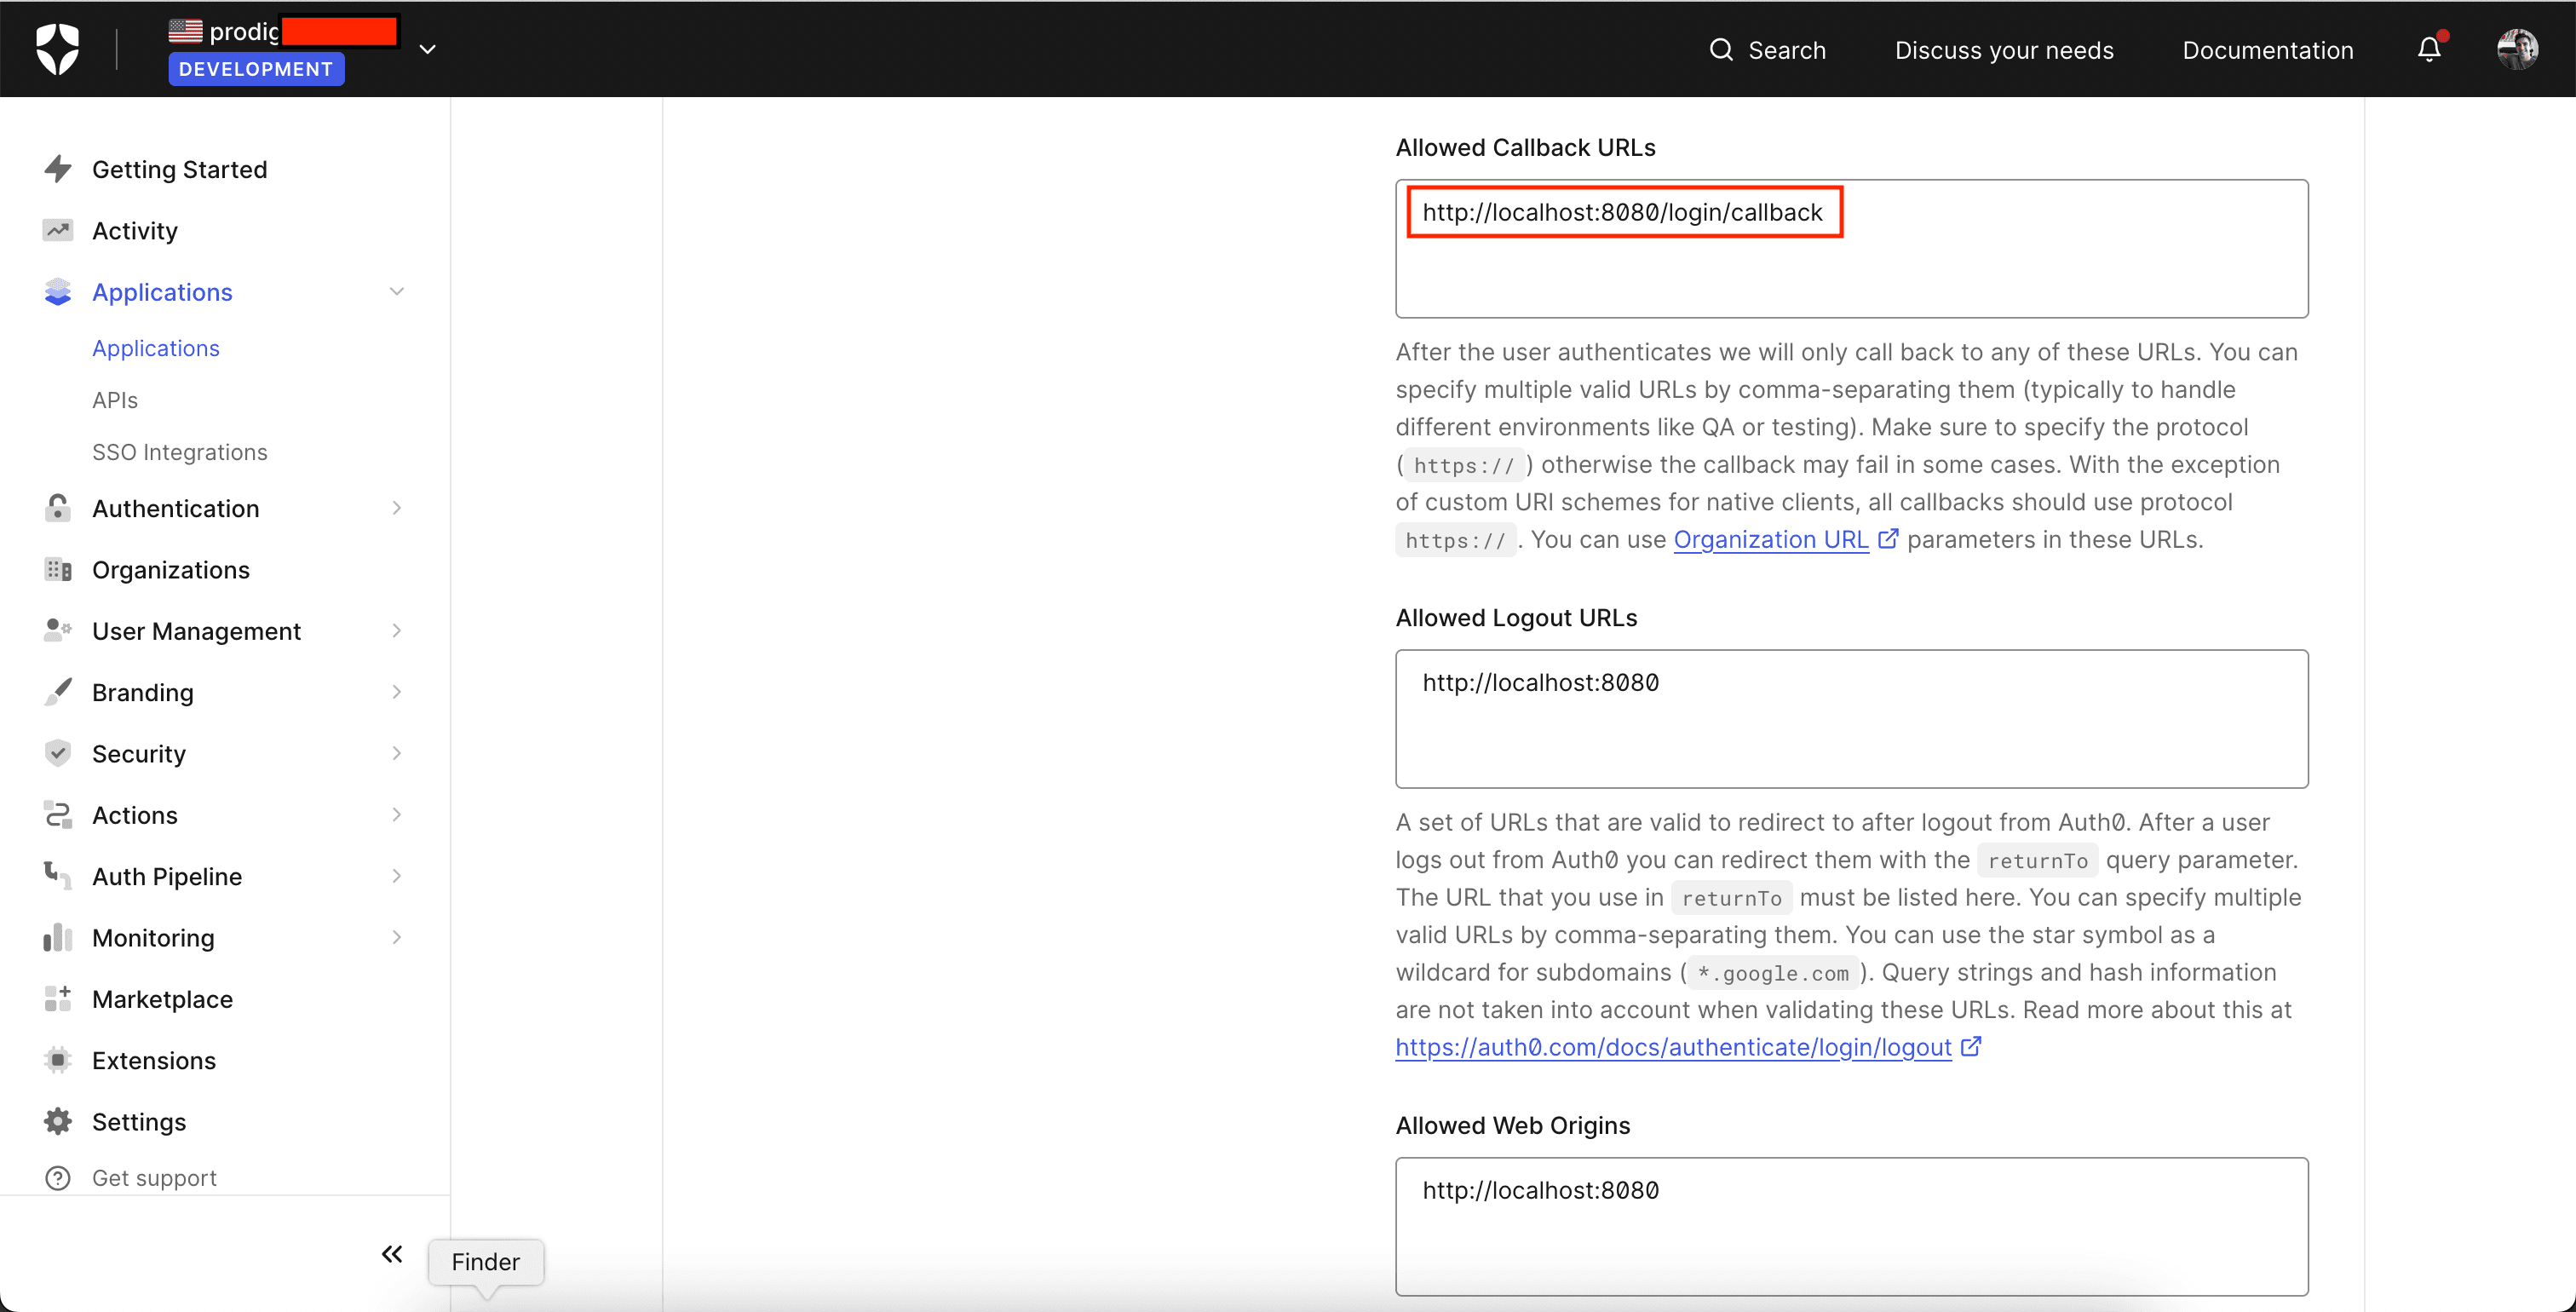
Set Prodigy as an Allowed Callback URL
You can configure a custom route for the Prodigy Auth Callback handler to be
served at but, by default, it will be served at /login/callback
When running Prodigy locally with the default settings, it will be served at
http://localhost:8080, so for testing we need to add
http://localhost:8080/login/callback to the list of Auth0 Allowed Callback
URLs.
Deploying Prodigy with HTTPS.
When your local testing is complete and it’s time to deploy the Prodigy server
on a public, secured domain, the PRODIGY_DEPLOYED_URL setting can be set as
the base URL the OIDC plugin will build all its redirect URLs off of.
For Example, if a Prodigy NER Manual Annotation server has been deployed at
https://my-prodigy-ner-server.my-domain.com, set this Environment variable
like below:
PRODIGY_DEPLOYED_URL="https://my-prodigy-ner-server.my-domain.com"
And now, Auth0 needs to be updated to know about this deployed URL.
The Login Callback URL is the base URL combined with the /login path. So let’s
add https://my-prodigy-ner-server.my-domain.com/login/callback to the list of
Allowed Callback URLs in Auth0.
Configuring Prodigy
Once you have the prodigy-company-plugins package installed, configuring OIDC
auth is as simple as setting a few Environment Variables.
To enable the Company Auth plugin, you explicitly need to set the
PRODIGY_OIDC_AUTH_ENABLED Environment variable.
Prodigy utilizes OpenID Connect Discovery to provide all the endpoints and configuration it will use to authenticate annotators.
Auth0 provides a standard OIDC Discovery endpoint at
https://YOUR_APP_DOMAIN/.well-known/openid-configuration , where
YOUR_APP_DOMAIN can be found in your Application’s Basic Information under
Settings. Other than that, you need to provide your Client ID and Client Secret
which you can copy from your Auth0 application dashboard
PRODIGY_OIDC_AUTH_ENABLED="1"
PRODIGY_OIDC_DISCOVERY_URL="https://YOUR_APP_DOMAIN/.well-known/openid-configuration"
PRODIGY_OIDC_CLIENT_ID="YOUR_AUTH0_CLIENT_ID"
PRODIGY_OIDC_CLIENT_SECRET="YOUR_AUTH0_CLIENT_SECRET"
All Configuratable Auth Settings
The OIDC Plugin lets you set any of the following config values.
| Variable | Description |
|---|---|
PRODIGY_OIDC_AUTH_ENABLED | Required. Boolean Flag to enable OIDC company Authentication. Remove or set to a falsey value to skip Auth |
PRODIGY_OIDC_DISCOVERY_URL | Required. URL pointing to an OpenID Connect Configuration endpoint. |
PRODIGY_OIDC_CLIENT_ID | Required. The unique Client ID (sometimes called Application ID) of your OpenID Connect Provider. |
PRODIGY_OIDC_CLIENT_SECRET | Required. A valid Client Secret configured for your specific Client ID. |
PRODIGY_OIDC_AUDIENCE | The audience to authenticate and verify ID tokens against. This defaults to the Client ID but some providers will require a different audience. |
PRODIGY_OIDC_REQUIRED_SCOPES | The scopes the user will be asked to give on first login. Defaults to openid profile email. Minimally requires openid for authentication to work. email is required for authorization by email domain/address with PRODIGY_OIDC_ALLOWED_EMAILS |
PRODIGY_OIDC_ALLOWED_EMAILS | A list of emails or email domains to restrict access to. e.g. test@test.com *@yourdomain.com. |
PRODIGY_OIDC_LOGOUT_PATH | The OpenID Connect Protocol defines an “end_session_endpoint” which will logout a user. Not all providers will have this endpoint listed (e.g. it’s missing from the Auth0 config). You can customize this logout path if your provider doesn’t return one from the OIDC config. Defaults to /oidc/logout. |
PRODIGY_LOGIN_PATH | The path for the login endpoint on the Prodigy server. User’s are redirected if they aren’t authenticated and this endpoint takes care of redirecting to the configured OIDC provider. Defaults to /login. |
PRODIGY_LOGIN_CALLBACK_PATH | The path for the login redirect endpoint on the Prodigy server. This path informs what you’ll need to enter in your Provider app config in the “Allowed Callback URLs” config area. Defaults to /login/callback. |
PRODIGY_LOGOUT_PATH | The path for the logout endpoint on the Prodigy server. Clears the Auth related cookies before redirecting to the OIDC Logout route if one is provided |
PRODIGY_DEPLOYED_URL | The base URL the Prodigy server is deployed at. This will be the base URL which all the auth calls are redirected back to. |
Starting Prodigy with Auth0 Authentication
The Prodigy OIDC Auth Plugin is built on top of the existing Prodigy application so you can start any annotation recipe you’d like normally.
Let’s start a basic ner.manual recipe to annotate mentions of PERSON,
ORGANIZATION, and LOCATION labels in News Headlines
Recipe command
prodigy ner.manual ner_news_headlines blank:en ./news_headlines.jsonl --label PERSON,ORG,PRODUCT,LOCATION ℹ Prodigy Company Auth Enabled ✨ Starting the web server at http://localhost:8080 ...
Open the app in your browser and start annotating!
Prodigy will confirm OIDC Auth is configured in the console (with more details at the verbose logging level) before the server is started.
Now if we try to start annotating by visiting http://localhost:8080, we’ll be
redirected to login with the configured Auth0 Application.
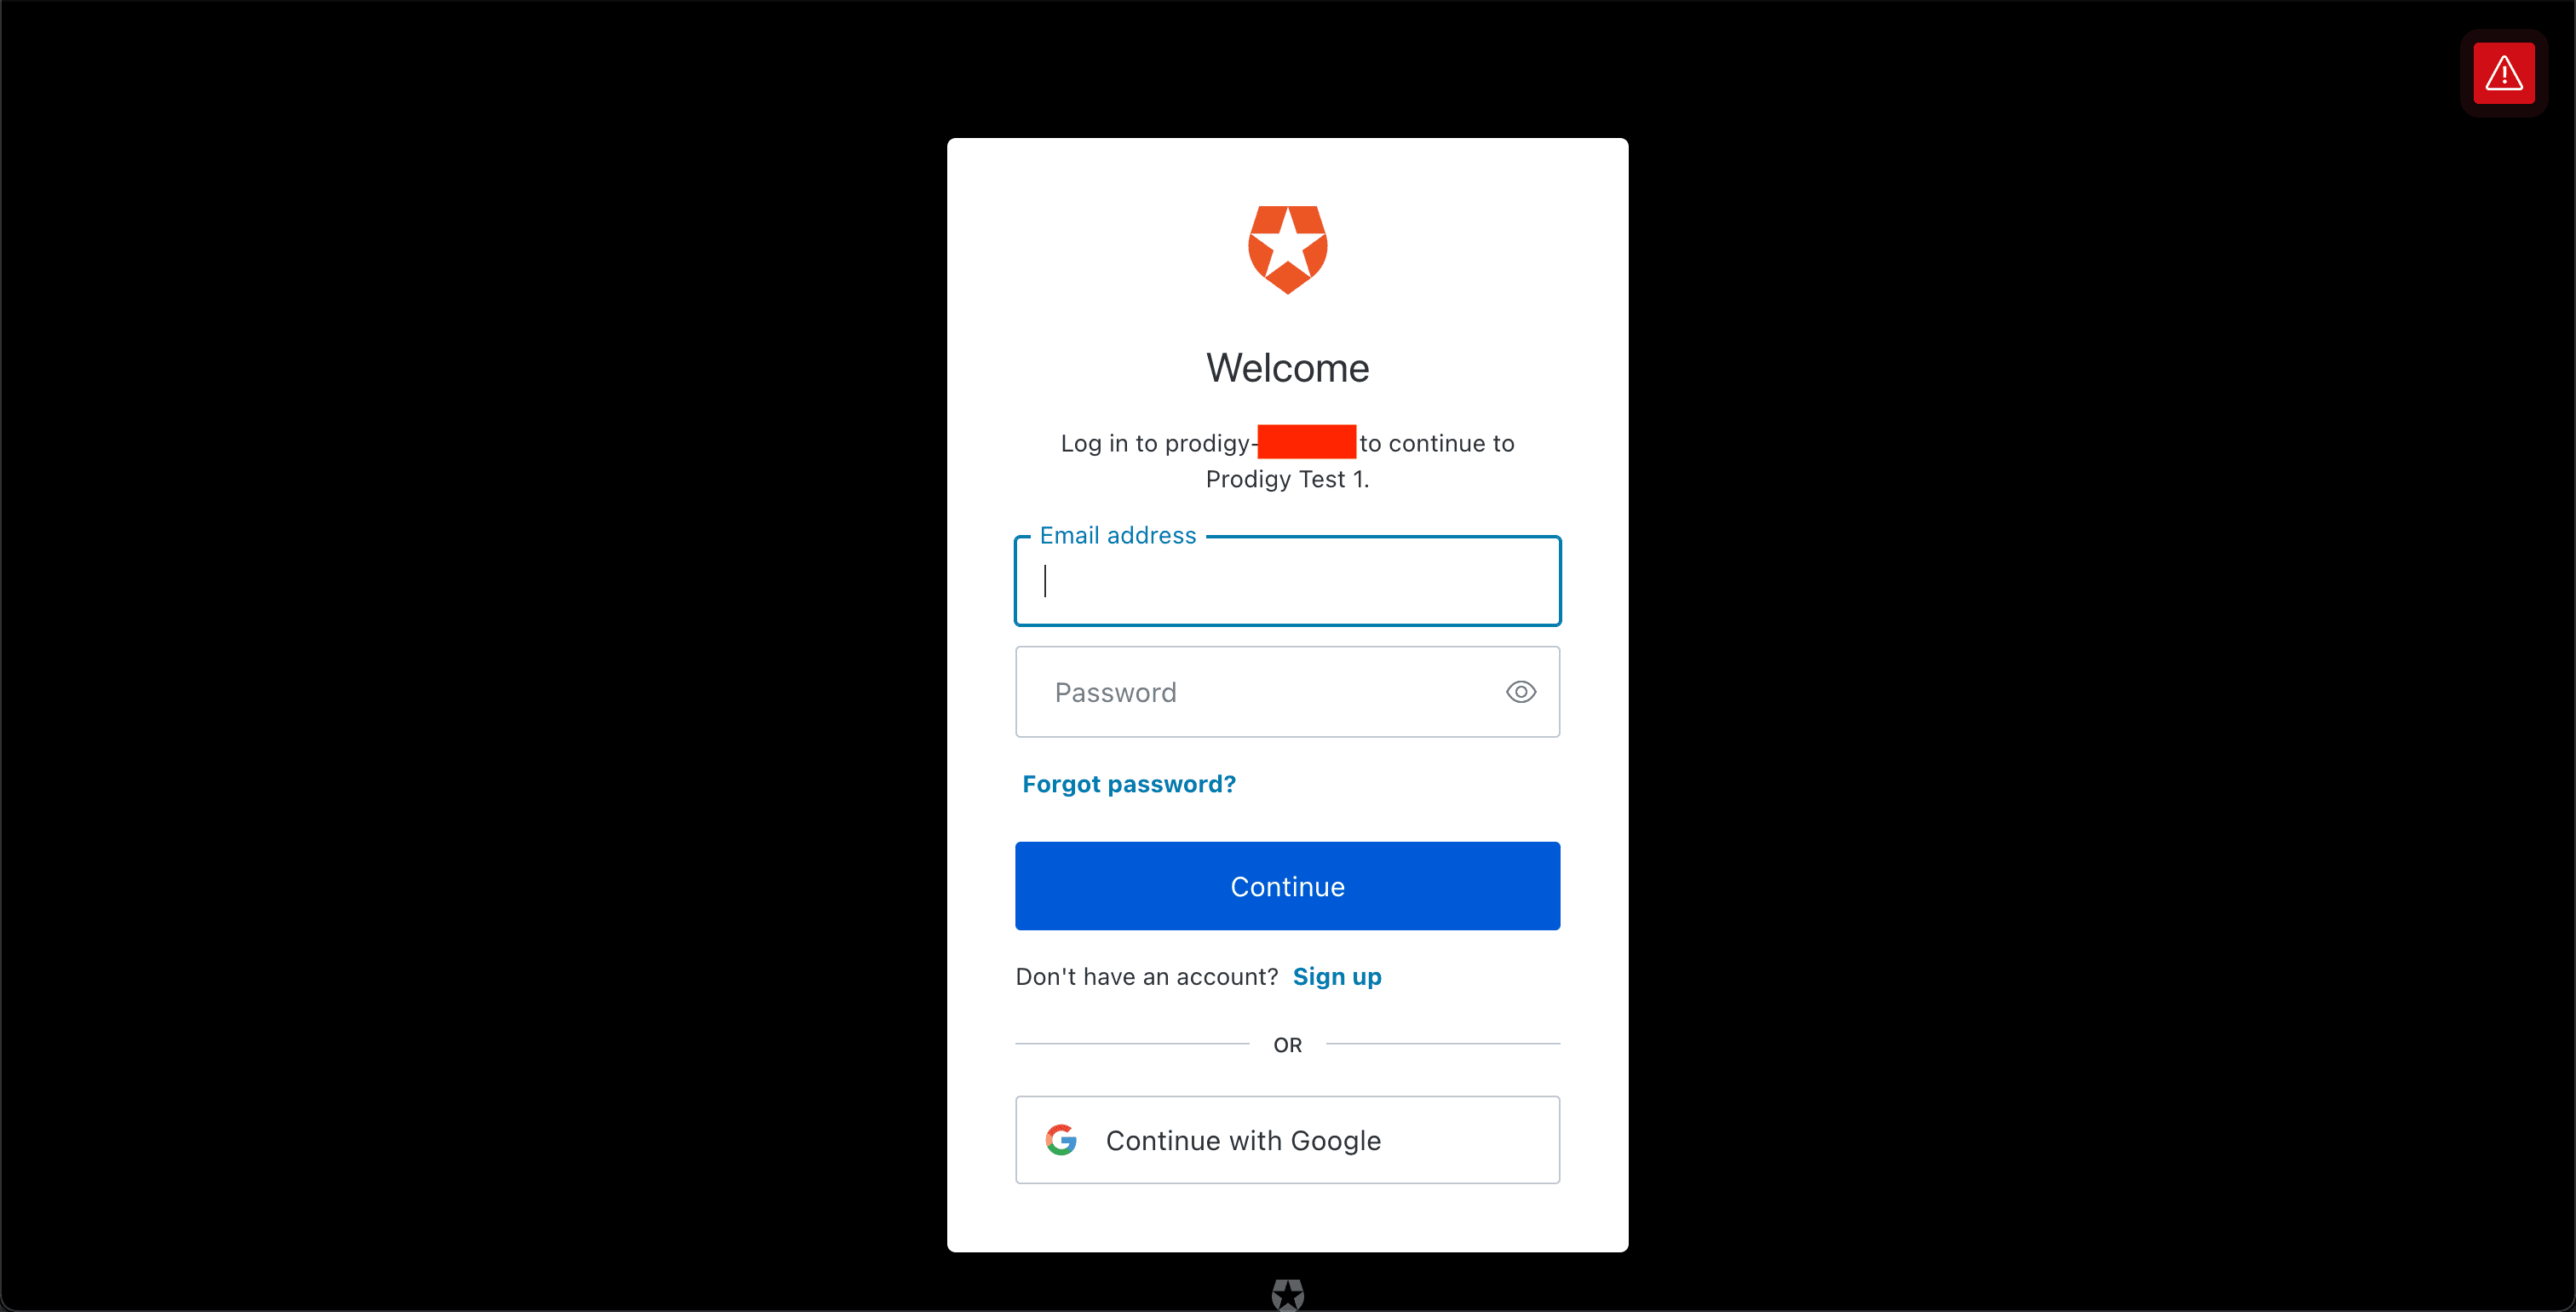
By default, Auth0 allows registration of new users for personal applications. So
we click “Continue with Google” and sign in to this app with a personal Google
Account. Prodigy provides the ?redirect_uri parameter to Auth0 based on what
we configured earlier as the login callback URL (by default
http://localhost:8080/login/callback).
After signing in with Google, we get redirected to the login callback URL,
Prodigy saves some httponly cookies for the ID and Access Tokens provided by
Auth0’s token endpoint and each subsequent HTTP request in Prodigy validates the
user’s ID Token against the publicly available RS256 JWKs from Auth0.
Once the token expires, the cookie is cleared and the user will be asked to login with Auth0 again.
Finally, after the Auth0 login is completed and we’ve saved the authentication
cookies, the annotator is redirected to the main Prodigy app at
http://localhost:8080?session={YOUR_AUTH0_SUB}. If you’ve never used the Named
Multi-User Sessions in Prodigy before, this ?session parameter is what Prodigy
uses to deterimine which tasks to route to which annotators depending on your
feed_overlap, annotations_per_task settings and your configured
task_router.
Each annotation the logged in user makes will now be tagged with their ID provided from Auth0 and can easily be traced back to this user.
Annotate with Prodigy as a known Annotator
After logging in with Auth0, an httponly cookie is saved with the user’s ID
Token. Visiting the base Prodigy Annotation URL at http://localhost:8080/ will
redirect the User to their session specific annotation URI:
http://localhost:8080/?session={YOUR_AUTH0_SUB}.
And the user can now annotate normally.
Try it live and highlight entities!
Restrict Authorized Annotators by email
Fine-grained control of Authorization can usually be controlled at the OIDC
Provider level by restricting an application to a specific organization. If you
just want to restrict access based on a user’s email/email domain you can use
the PRODIGY_ALLOWED_EMAILS setting. The setting accepts a space-separated list
of exact or wildcard emails to allow access to.
PRODIGY_ALLOWED_EMAILS="*@my_company.com annotator1@gmail.com annotator2@outlook.com"
As an example, the config above would allow any employee of my_company.com
along with 2 annotator’s on contract to access Prodigy. Any other logins with
invalid emails will get through the Auth0 login step, but will be met with an
error when they are redirected back to Prodigy.