Web Application
When humans interact with machines, their experience is what decides about the success of the interaction. Prodigy helps you collect annotations faster and more efficiently by focusing on one task at a time, and reducing each annotation to simple and intuitive decisions. For more background on the Prodigy philosophy and thoughts that went into developing the tool, see our blog posts on UX-driven data collection and front-end development for AI.

The web app includes a range of built-in
annotation interfaces,
key bindings and mobile swipe gestures and fully customizable
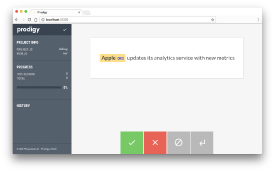
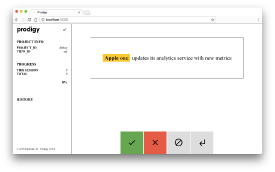
UI themes. When you annotate a task, the decision – accept, reject or
ignore – is added to the task as the "answer" key. The ten most recent
decisions are shown in the sidebar and remain editable, either by clicking
“undo”, or by selecting them from the history. Annotated tasks are sent back to
the REST API in batches. To save the current progress manually, you can always
hit the save button, or press command+s (on Mac) or
ctrl+s.
Keyboard shortcuts and swipe gestures
For more convenient annotation, you can use the following key bindings:
| Action | Description | Keys | |
|---|---|---|---|
accept | Accept an annotation. | a | |
reject | Reject an annotation. | x | |
ignore | Ignore an annotation. | space | |
undo | Undo the last annotation decision. | backspace, del | |
save | Save the current buffer of annotations. | command+s, ctrl+s | |
flag | Flag an example to bookmark it for later, if enabled. | f | |
help | Show annotation instructions, if available. | h | |
choice | Select a label in a manual interface or an option in a choice interface. | 0 - 9 |
The numbers 1 to 9 map to the options 1 through 9, and 0 maps to option 10. For interfaces with more than 10 options, e.g. manual annotation with larger label sets, the options 11 though 20 are available via shift+num and 21 through 30 via shift+alt+num. For example, shift+6 will select option 16, and shift+alt+0 option 30.
Spans shortcuts
The ner_manual and spans_manual interfaces also support the
following keyboard shortcuts:
| Action | Description | Keys | |
|---|---|---|---|
edit | Start text editing if edit_text config setting is enabled. | command+e | |
edit_save | Save text edits and submit to recipe event hook to retokenize and align example. | command+enter | |
edit_exit | Exit the text editing without saving and reset. | escape | |
chars | Toggle between character-based highlighting and token-based highlighting if enabled. | c |
Image shortcuts
The image_manual interface also supports the following keyboard
shortcuts:
| Action | Description | Keys | |
|---|---|---|---|
rect | Draw a rectangular shape. | r | |
polygon | Draw a polygon shape. | t, p | |
freehand | Draw a freehand shape. | f | |
delete | Delete the selected shape. | d | |
reset | Reset the image to its original or previous state. | q | |
exit | Exit the current shape. | escape | |
labels | Toggle the “All labels” UI setting. | l | |
select | Hold down to select a shape by clicking on it (instead of its label). | shift | |
ratio | Draw rects and resize shapes with a fixed ratio. | shift |
In addition to the shortcuts listed above, you can also use the arrow keys ↑ ↓ ← → to move the selected shape by one pixel in either direction.
Audio shortcuts New: 1.10
The audio_manual UI provides the following additional shortcuts:
| Action | Description | Keys | |
|---|---|---|---|
playpause | Start the playback if it’s currently paused. | enter | |
playpause | Pause the playback if it’s currently playing. | enter | |
zoom | Focus the zoom slider (adjusted using left ← and right → arrow keys). | z | |
loop | Toogle looping. | l | |
reset | Reset the regions to their original or previous state. | q |
Dependency relation shortcuts New: 1.10
The relations UI provides the following additional shortcuts:
| Action | Description | Keys | |
|---|---|---|---|
rels | Switch to dependency annotation mode. | r | |
spans | Switch to span highlighting mode. | s | |
delete | Delete the selected span in span highlighting mode. | d | |
reset | Reset the relations and spans to their original or previous state. | q | |
exit | Exit the current selection. | escape | |
select | Hold down to select multi-token span (click on first token, then last token). | shift |
Pages shortcuts New: 1.17
The pages UI provides the following additional shortcuts:
| Action | Description | Keys |
|---|---|---|
prev | Navigate to previous page. | alt+← |
next | Navigate to next page. | alt+→ |
page | Navigate to a specific page. | alt+1, alt+2, … |
Custom keyboard shortcuts New: 1.9
As of v1.9, Prodigy lets you customize the keyboard shortcuts for the main actions (currently excluding the number shortcuts for options and labels). For each action name, you can override the key bindings with a list of one or more keys or key combinations.
prodigy.json
Custom keyboard shortcuts for labels New: 1.9.4
In addition to the "keymap", v1.9.4 also lets you customize the shortcuts for
individual labels in interfaces like ner_manual or
image_manual using the "keymap_by_label" setting. It maps label
names or numbers ("1" for the first choice option, and so on), to single
keys. If no custom key is provided for a given label or option, Prodigy will
fall back to its default number key.
prodigy.json
Swipe gestures
You can also enable swipe gestures on touch devices by setting "swipe": true
in your prodigy.json. This will let you swipe left for accept and
swipe right for reject. As of v1.10.5, you can use the
"swipe_gestures" config setting to customize the left and right mapping if you
want to swipe right instead of left for accept, or only enable
swiping for one action.
Customization settings
Customizing action buttons New: 1.10
As of v1.10, you can customize the buttons displayed in the app via the
"buttons" config setting, either in your prodigy.json or the "config"
returned by a custom recipe. This can be useful if you
want to limit the annotation answer choices. If any of the answers
accept, reject or ignore are disabled, the user
won’t be able to assign them anymore and the keyboard shortcuts will be
disabled, too. The undo action will always be available via its
shortcut and by clicking on a history entry in the sidebar, even if you hide the
action button.
prodigy.json or recipe config
Prodigy with custom buttons
Statistics and progress
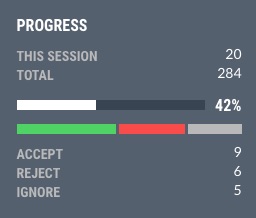
The sidebar helps you keep an overview of your annotation project and includes a progress widget showing the project’s annotation count, progress and optional detailed statistics for the accept, reject and ignore decisions. To re-add an already annotated task to the front of the queue and change your decision, simply click on it in the history, or use the undo button or the backspace key. See the config settings for customization options.

prodigy.json
Flagging tasks
Flagging a task lets you bookmark it for later, independent of the annotation
decisions accept, reject and ignore. This can
be useful to keep a record of seemingly strange predictions of your model, to
investigate later on, or to save interesting examples you come across. Since
flagging is mostly developer functionality, it’s disabled by default and
requires the "show_flag" setting. Flagged tasks will receive a
"flagged": true entry, and can be exported separately by setting
--flagged-only on db-out.
prodigy.json
Annotation instructions
If you need to provide more detailed annotation instructions, you can use the
"instructions" config setting to load in a text or HTML file. The instructions
will then be displayed in a modal, accessible via the help icon at the top, or
by pressing h.
prodigy.json
Annotation UI language New: 1.10
The "ui_lang" setting lets you change the language of descriptions, messages
and tooltips in the annotation UI. This can be useful if your annotators feel
more comfortable if the app speaks their language. You can also
customize texts if needed.
Note that the UI language has nothing to do with the language of the data you’re annotating. You can annotate text in any language, and set the UI language to any of the available options.
prodigy.json
en | English (default) | View live demo → |
de | German | View live demo → |
nl | Dutch | View live demo → |
es | Spanish | View live demo → |
pt | Portuguese | View live demo → |
fr | French | View live demo → |
zh | Chinese | View live demo → |
Customizing UI texts and messages New: 1.18
In addition to setting the UI language to use, you can also overwrite individual texts. This lets you customize existing descriptions or even implement a new translation and localization for a language currently not included out of the box. Each message has a unique ID that’s mapped to a string or an array of strings for multi-part messages. See below for available IDs and English defaults.
prodigy.json
Available message IDs and defaults
Default locale
Themes
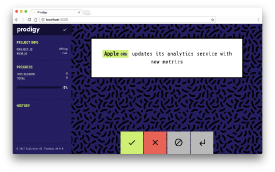
Prodigy comes with three built-in theme options. To change the theme, simply
edit the theme setting in your configuration file and restart the web app. The
theme options are "basic" (default), "dark", "eighties", "spacy" and
"brutalist".
You can also overwrite a range of colors and other layout properties under the
"custom_theme" setting to customize the look and feel of the application.
| Setting | Description | Default |
|---|---|---|
accept | Color to visualize “accept” action. | #4fd364 |
reject | Color to visualize “reject” action. | #f74c4a |
ignore | Color to visualize “ignore” action. | #b9b9b9 |
undo | Color to visualize “undo” action. | #b9b9b9 |
bgCard | Background of annotation card. | #ffffff |
bgCardSecondary | Second background color option, used for accents. | #f6f6f6 |
bgCardTertiary | Third background color option, used for accents. | #dddddd |
bgCardQuaternary | Fourth background color option, used for accents. | #aaaaaa |
bgPage | Page background. | #f6f6f6 |
bgSidebar | General sidebar background. | #54606e |
bgSidebarDark | Darker shade of sidebar color for header and accents. | #384451 |
bgHighlight | Background of highlighted text, e.g. entities. | #ffe184 |
bgLowlight | Background of subtly highlighted text, e.g. spans outside entities. | #d9d9d9 |
bgCardTitle | Background color of card title, e.g. text category. | #583fcf |
bgProgress | Color of progress bar. | #ffffff |
bgButton | Default annotation button background (disabled). | #b9b9b9 |
bgMeta | Background of card meta text. | #f6f6f6 |
colorText | General text color. | #444444 |
colorMeta | Text color of card meta text. | #939393 |
colorMessage | Text color of loading or error message if no card is displayed. | #6e6e6e |
colorSidebar | Text color in sidebar. | #ffffff |
colorSidebarHeadline | Text color of sidebar headlines. | #ffffff |
colorSidebarLabel | Text color of of sidebar sub-headlines, e.g. “Dataset”. | #b9b9b9 |
colorButton | Icon color of annotation buttons. | #ffffff |
colorHighlightLabel | Text color of label on highlighted text, e.g. entity label. | #583fcf |
colorCardTitle | Text color of card title, e.g. category. | #ffffff |
cardBorder | Border around card. | 1px solid #ddd |
cardShadow | Box shadow around card. | 1px 1px 5px #ddd |
cardBorderRadius | Border radius of card. | 0 |
sidebarBorder | Right border on sidebar. | none |
labels | Custom label colors, keyed by label name. | see below |
You can also customize a theme’s fonts. The primary font is used for most text, while the secondary font is used for headlines and labels.
| Setting | Default |
|---|---|
fontPrimary | "Lato", "Trebuchet MS", Roboto, Helvetica, Arial, sans-serif |
fontSecondary | "Roboto Condensed", "Arial Narrow", sans-serif |
Theme sizes
Themes can also overwrite some of the default text and container sizes (in pixels):
| Setting | Description | Default |
|---|---|---|
largeText | Large annotation card text (for short texts). | 37.5 |
mediumText | Medium annotation card text (for medium texts). | 24 |
smallText | Small annotation card text (for long texts). | 20 |
buttonSize | Width and height of annotation buttons. | 100 |
progressHeight | Height of progress bar. | 10 |
cardMaxWidth | Maximum width of card. | 675 |
cardMinWidth | Minimal width of card. | 300 |
cardMinHeight | Minimal height of card. | 100 |
relationHeight | Maximum height of arc space in relations. | 325 |
relationHeightWrap | Maximum height of arc space in relations if lines wrap. | 80 |
pageThumbnailHeight | Default height of image thumbnails in pages. | 50 |
Color palettes
The following color palettes are used across the different interface types, unless other colors are specified in the data or via custom label colors. Colors are selected based on annotation or label in order and once the list is exhausted, it starts again at the first color. Different themes may also implement different color palettes.
images | #ffff00 #00ffff #ff00ff #00ff7f #ff6347 #00bfff #ffa500 #ff69b4 #7fffd4 #ffd700 #ffdab9 #adff2f #d2b48c #dcdcdc |
audio | #ffd700 #00ffff #ff00ff #00ff00 #9932cc #00bfff #ff7f50 #66cdaa |
relations | #c5bdf4 #ffd882 #d9fbad #c2f2f6 #ffdaf9 #b5c6c9 #96e8ce #ffd1b2 |
spans (overlapping) | #c5bdf4 #ffd882 #d9fbad #c2f2f6 #ffdaf9 #b5c6c9 #96e8ce #ffd1b2 |
As of Prodigy v1.11, you can customize the color palettes via the "palettes"
via the "custom_theme" config. Palettes are keyed by name and map to a list of
HEX color values or color names:
prodigy.json (excerpt)
Custom label colors
Using the labels setting, a theme can specify custom label colors for entity
labels, part-of-speech tags, bounding boxes, audio regions and so on. The colors
will be used in both the manual and non-manual interfaces. If no label color is
set, a default color is used.
prodigy.json (excerpt)
Rest API
Prodigy communicates with its web application via a REST API. You can also use
this API to send requests to Prodigy directly, to the same port that’s running
the web application. By default,
cross-origin resource sharing
(CORS) is enabled, allowing you to make a request from a different origin, like
a different port or domain. To disable CORS, set "cors": false in your
configuration file.
Interactive API documentation New: 1.8
As of Prodigy v1.9, Prodigy’s REST API is powered by
FastAPI (in v1.8 you can optionally enable it
with the PRODIGY_FASTAPI variable). This
doesn’t only make the API faster – it also gives you interactive API docs
out-of-the-box if you navigate to localhost:8080/docs.
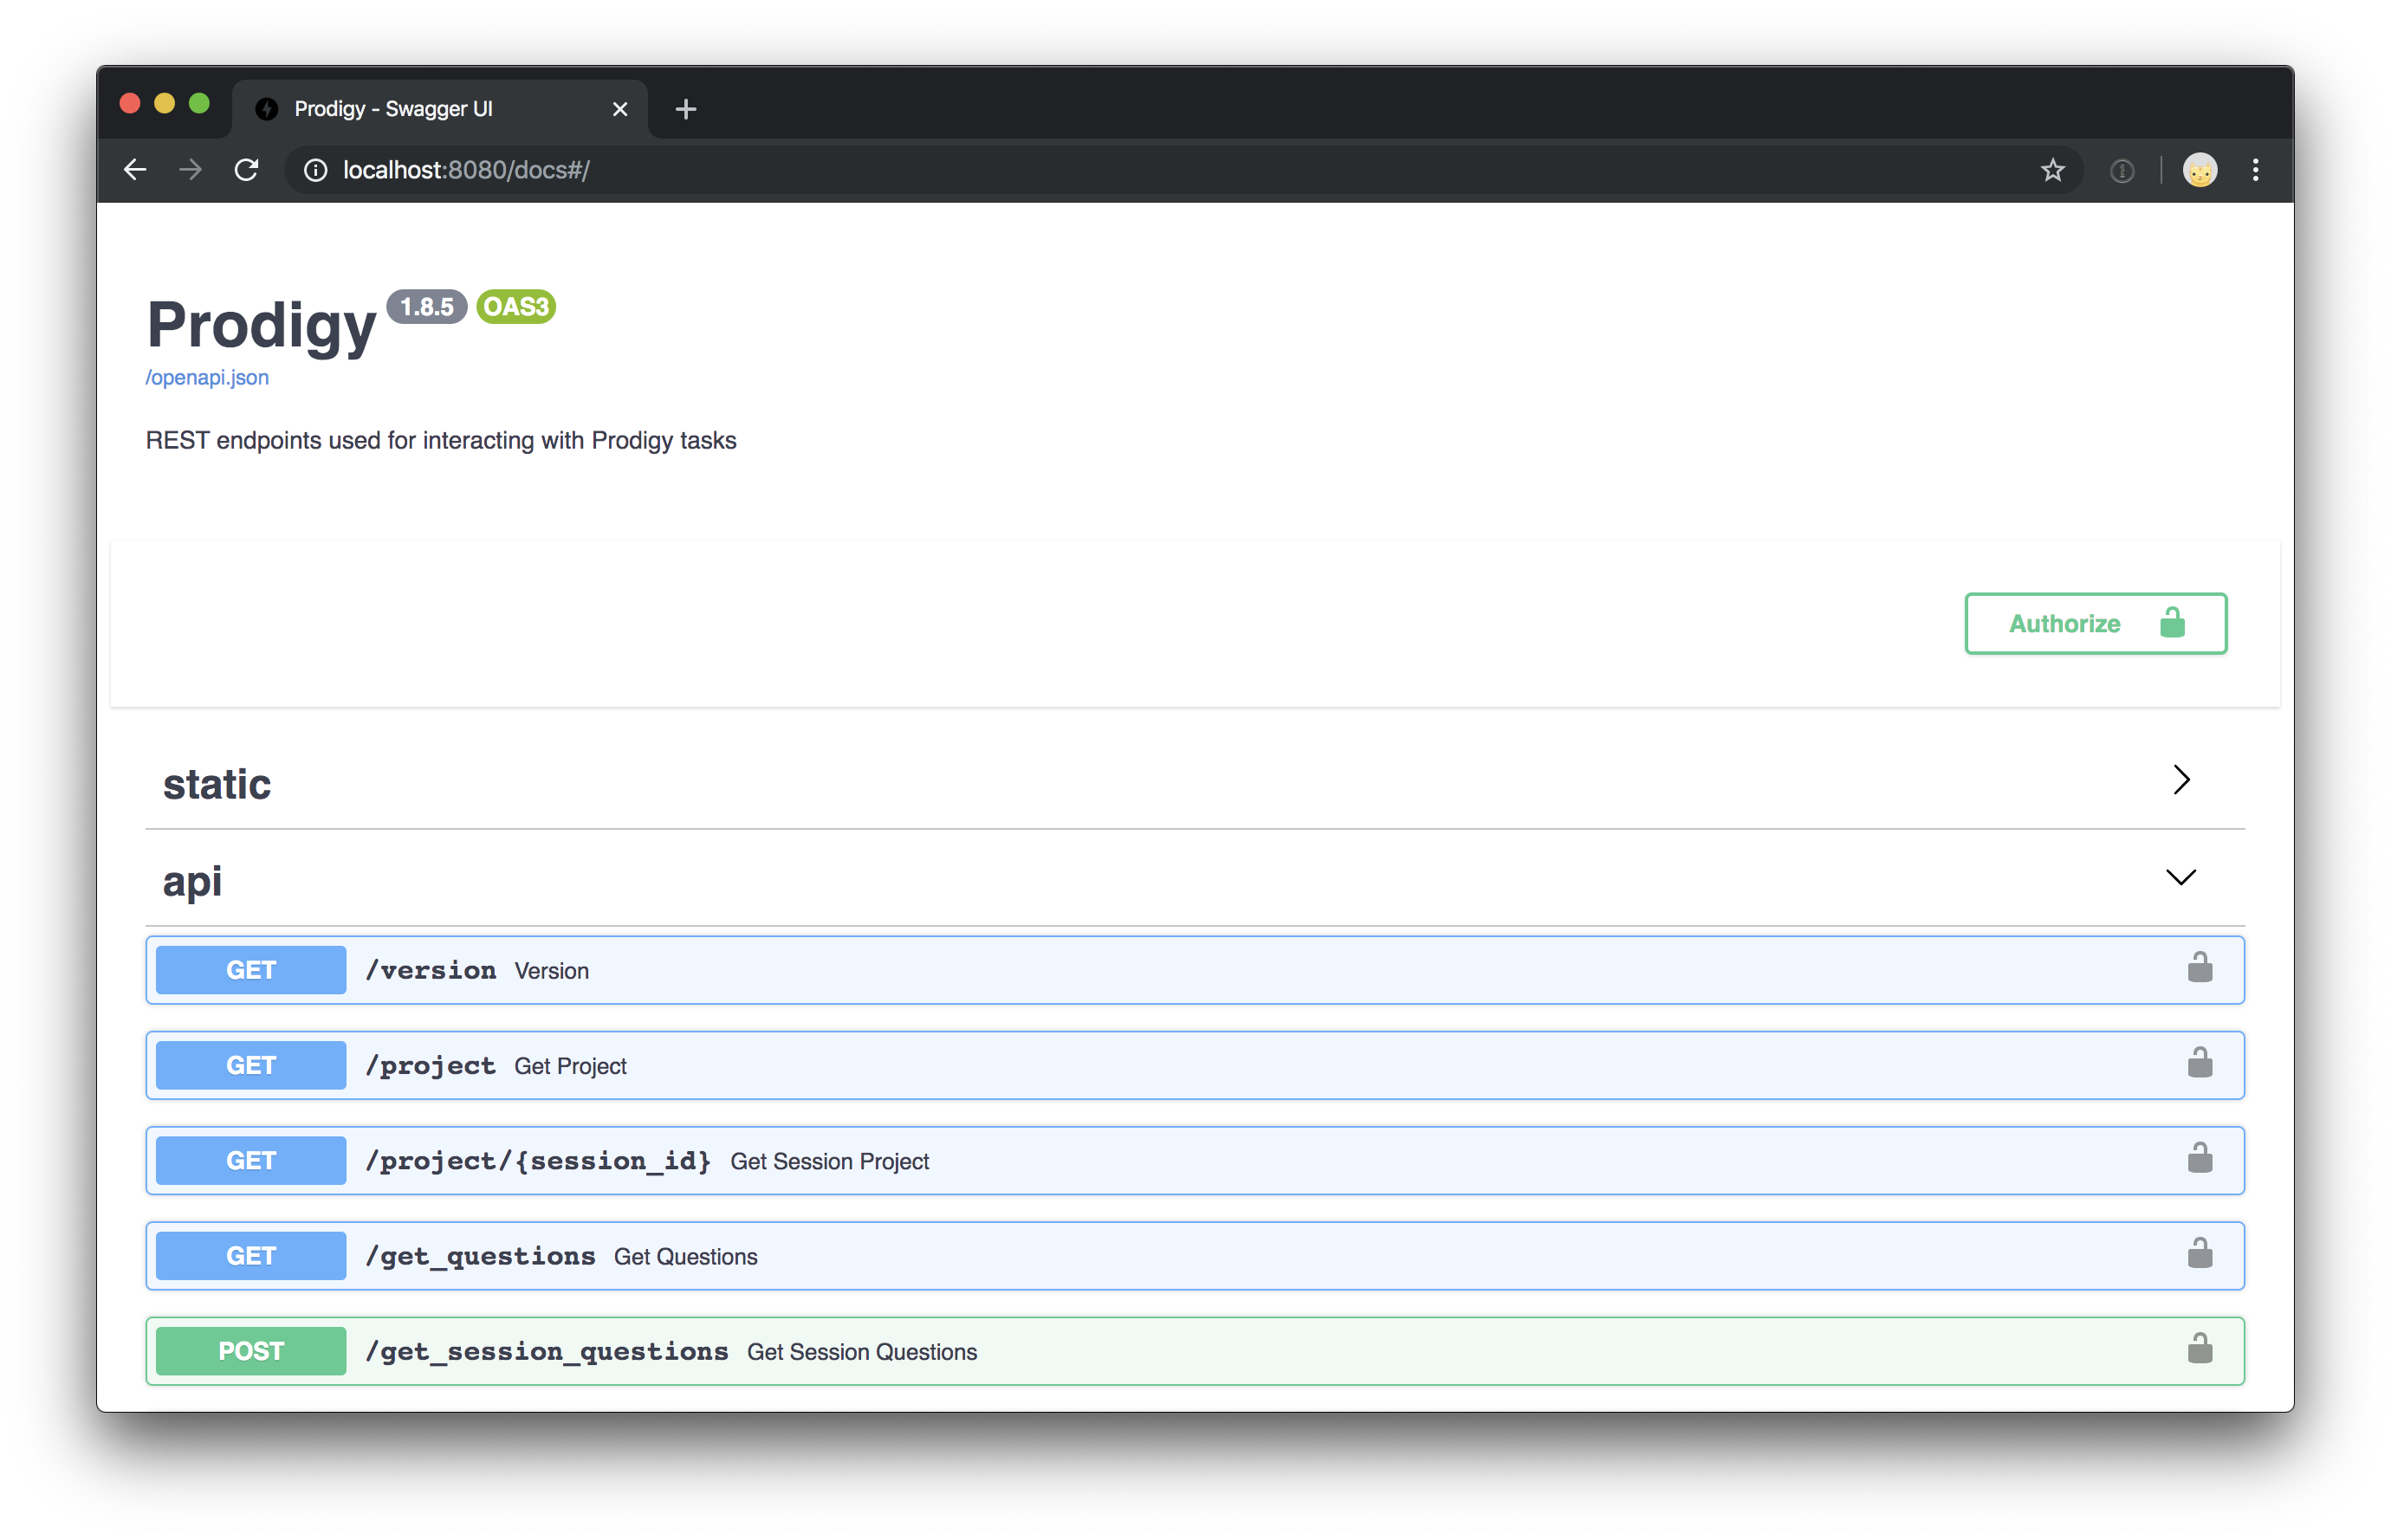
Most relevant endpoints
/project get
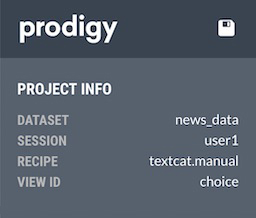
Get a project’s meta data and the current configuration. The web app makes one request to this endpoint on load to fetch the project information (displayed in the sidebar) and the front-end settings.
Example response
/health get
Get a static json object to confirm that the service is up. This allows hosting
services to check on the service at regular intervals. Besides the /health
endpoint we have also implemented the same functionality in the /healthz
endpoint.
Example response
/get_questions get
Get a new queue of tasks. The number of new tasks sent with each request can be
specified via the batch_size setting of a recipe or in your Prodigy config. On
each request, the endpoint also returns the number of total annotations and the
progress calculated by the annotation recipe.
Example response
/get_session_questions postNew: 1.7
Get the next batch of tasks to annotate for a given session_id. Used when
Prodigy is accessed from a named multi-user session.
Example request
Example response
/give_answers post
Send a list of annotated tasks containing an answer key and receive a progress
value. The web app makes a request to this endpoint every time a batch is
annotated, or if the user chooses to manually save the current progress. The
lower the batch_size, the more frequent the updates.
Example request
Example response
/validate_answer postNew: 1.10
Send an answer submitted by the user in the web app and validate it using a
function provided by the recipe. Only called if a
validate_answer callback is provided.
Example request
Example response
/event/[event_name] postNew: 1.14.1
Trigger a custom Prodigy event hook defined in your recipe.
You can call this event from custom JavaScript using the window.prodigy.event function.
For example, to interactively update the current task data, you can use window.prodigy.update
window.prodigy.event("update_task_event", { task: window.prodigy.content }) .then(new_task => { window.prodigy.update(new_task) })The event endpoint accepts an arbitrary request body and returns a JSON encoded body of whatever your custom event hook returns.
Example request /event/update_task_event
Example response
Will return a 404 not found if the event name is not registered with the current recipe.
Example request /event/unregistered_event_name
Example response (Status 404)
Named multi-user sessions New: 1.7
As of v1.7.0, Prodigy supports multiple named sessions within the same instance. This makes it easier to implement custom multi-user workflows and controlling the data that’s sent out to individual annotators.
To create a custom named session, add ?session=xxx to the annotation app URL.
For example, annotator Alex may access a running Prodigy project via
http://localhost:8080/?session=alex. Internally, this will request and send
back annotations with a session identifier consisting of the current dataset
name and the session ID – for example, ner_person-alex. Every time annotator
Alex labels examples for this dataset, their annotations will be associated with
this session identifier.
The "feed_overlap" setting in your prodigy.json or recipe config lets you
configure how examples should be sent out across multiple sessions. If true,
each example in the dataset will be sent out once for each session, so
you’ll end up with overlapping annotations (e.g. one per example per annotator).
Setting "feed_overlap" to false will send out each example in the data
once to whoever is available. As a result, your data will have each example
labelled only once in total.
As of v1.8.0, the PRODIGY_ALLOWED_SESSIONS environment variable lets you
define comma-separated string names of sessions that are allowed to be set via
the app. For instance, PRODIGY_ALLOWED_SESSIONS=alex,jo would only allow
?session=alex and ?session=jo, and other parameters would raise an error.
Partial overlap via annotations_per_task setting New: 1.12
As of v1.12.0, the "annotations_per_task" setting permits configuring partial
overlap between annotators. By setting it to a decimal (integers will be cast to floats), you can determine
the number of annotators that need to see each example on average. For example,
setting "annotations_per_task": 2.5 will result in each example receiving 2.5
annotations on average. The assignment of annotators is random but deterministic
thanks to leveraging Prodigy hashing system in annotator selection procedure. The new docs section on task routing explains these new mechanics in more
detail.